 International
 Singapore
 Malaysia
 Thailand
 Vietnam
Không có sản phẩm trong giỏ hàng!
Thanks for reading this tutorial. If you have any technical inquiry, please post at Cytron Technical Forum.
Không có sản phẩm trong giỏ hàng!

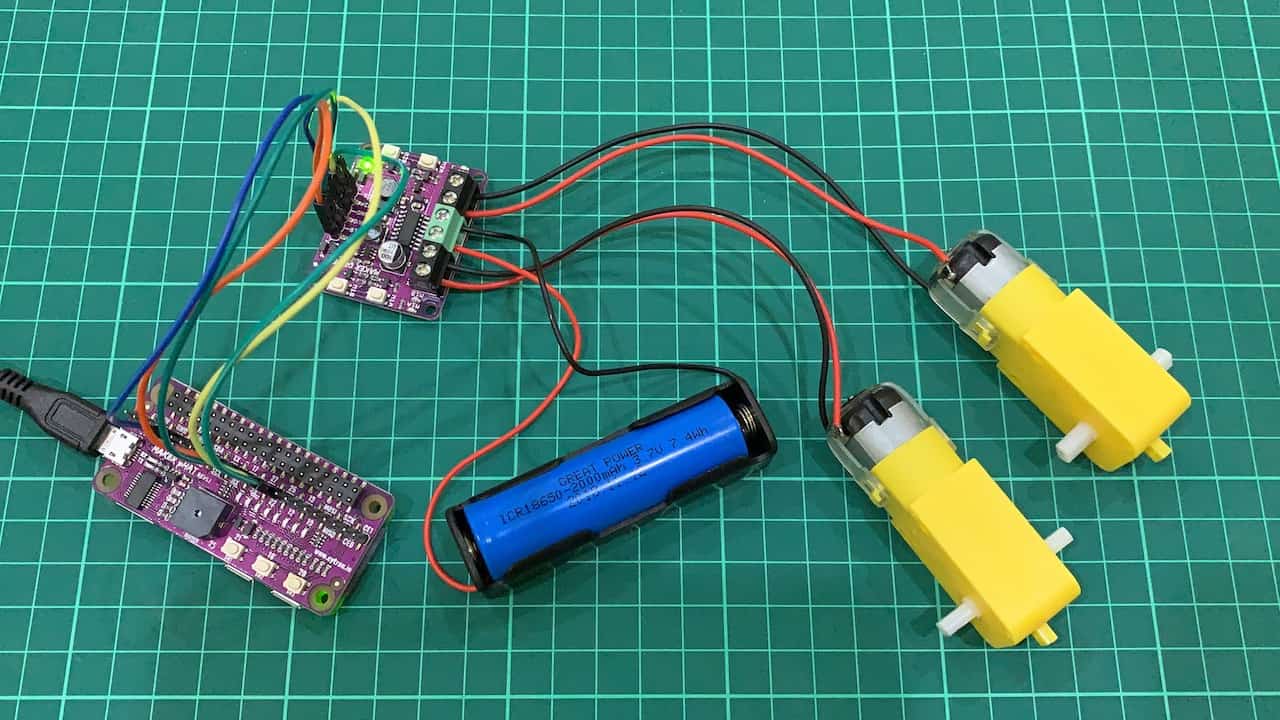
Besides interfacing Maker Drive with microcontroller, it also can be controlled by operating system controller like Raspberry Pi. This tutorial will show you how to setup and program your Pi to drive the DC motor using Maker Drive.
You may need to refer this tutorial first:
This video will show you on how to get start with Maker Drive and Raspberry Pi.
Untuk versi Bahasa Melayu, sila rujuk video dibawah.
Below is the list of items used in the video.
Wiring connection table.
| Raspberry Pi | Maker Drive | DC Motor | Battery |
| GPIO 17 | Pin M1A | ||
| GPIO 18 | Pin M1B | ||
| 5V0 | |||
| GND | GND | ||
| GPIO 27 | Pin M2A | ||
| GPIO 22 | Pin M2B | ||
| Terminal M1A | DC Motor 1 | ||
| Terminal M1B | DC Motor 1 | ||
| VB+ | Positive | ||
| VB- | Negative | ||
| Terminal M2A | DC Motor 2 | ||
| Terminal M2B | DC Motor 2 |
This is sample code used in the video. Please run pigpio daemon on terminal (sudo pigpiod) before run the program.
[gist https://gist.github.com/IdrisCytron/49a965f8730739f548acf63a0e92c75f/]
References:
Thanks for reading this tutorial. If you have any technical inquiry, please post at Cytron Technical Forum.

Không có sẵn

Không có sẵn

Không có sẵn