 International
 Singapore
 Malaysia
 Thailand
 Vietnam
Không có sản phẩm trong giỏ hàng!

Interfacing Maker Nano RP2040 with Grove LED Bar and Grove Slide Potentiometer
- Hussien Jawhar Sathik
- 25 Apr 2022
- Tutorial
- 984
Introduction
In this tutorial it is shown how to interface Maker Nano RP2040 with Grove LED Bar and Grove Slide Potentiometer. Basically the purpose of this tutorial is to demo how to interface the devices together and to illustrate how this can be implemented in other projects such as to show volume level, temperature level, pressure level and etc.
Video
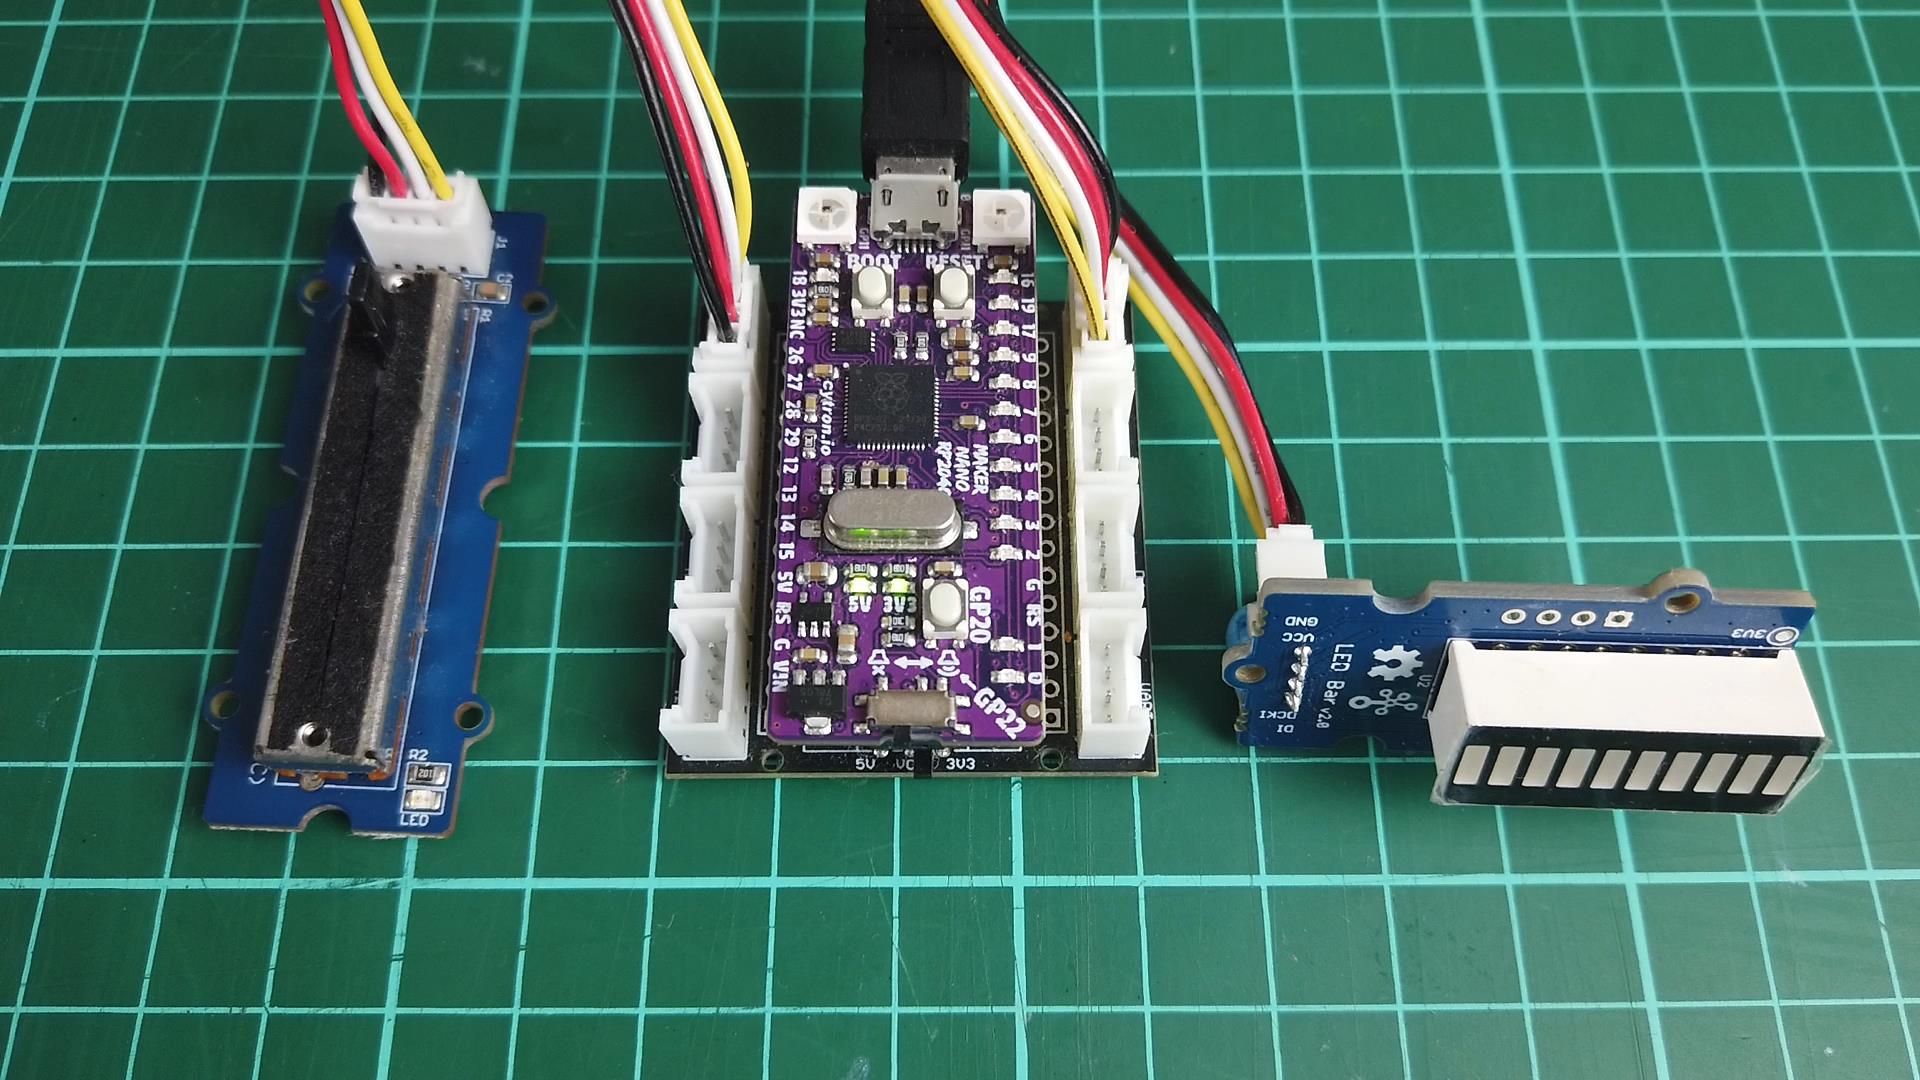
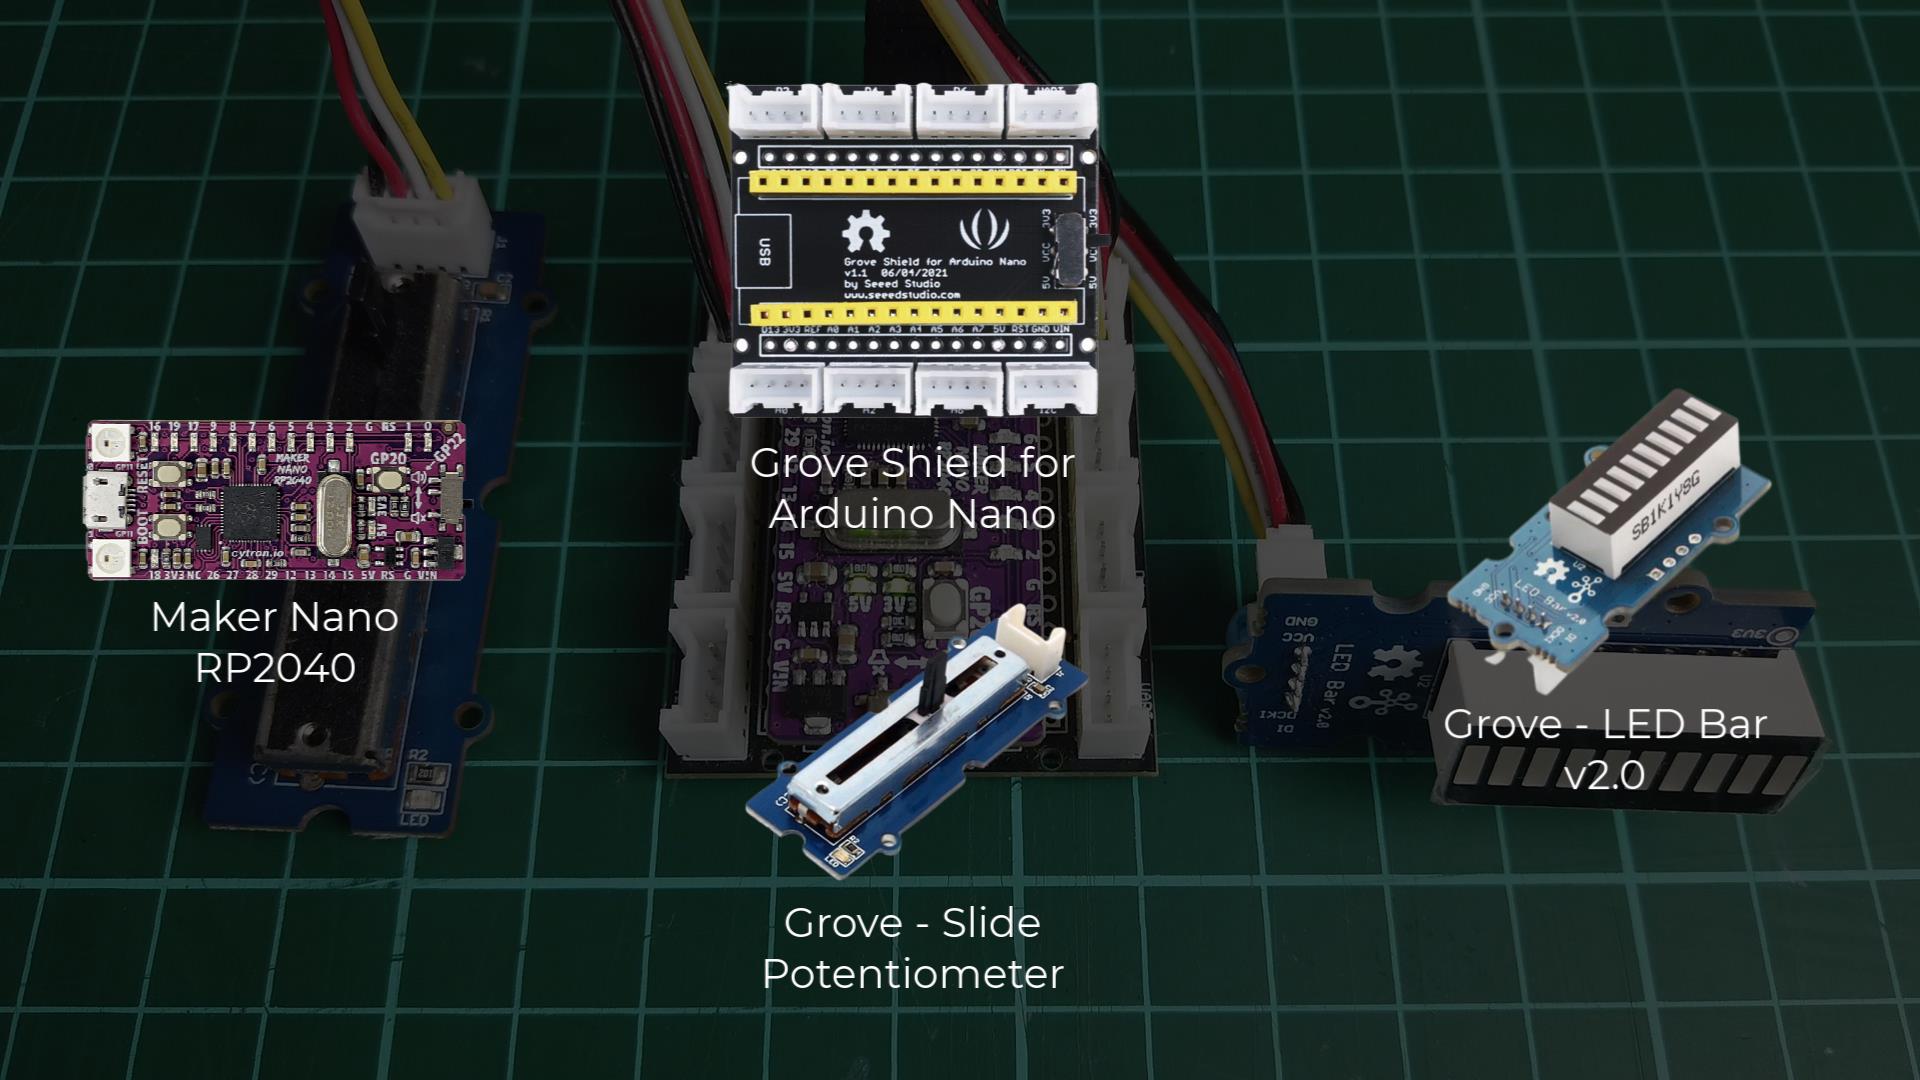
Hardware Preparation
The hardware setup for this tutorial is as shown below
Building The Circuit
- Constructing the circuit is pretty much easy since we are using the grove connector. The connection between the devices are done as per the below figure.
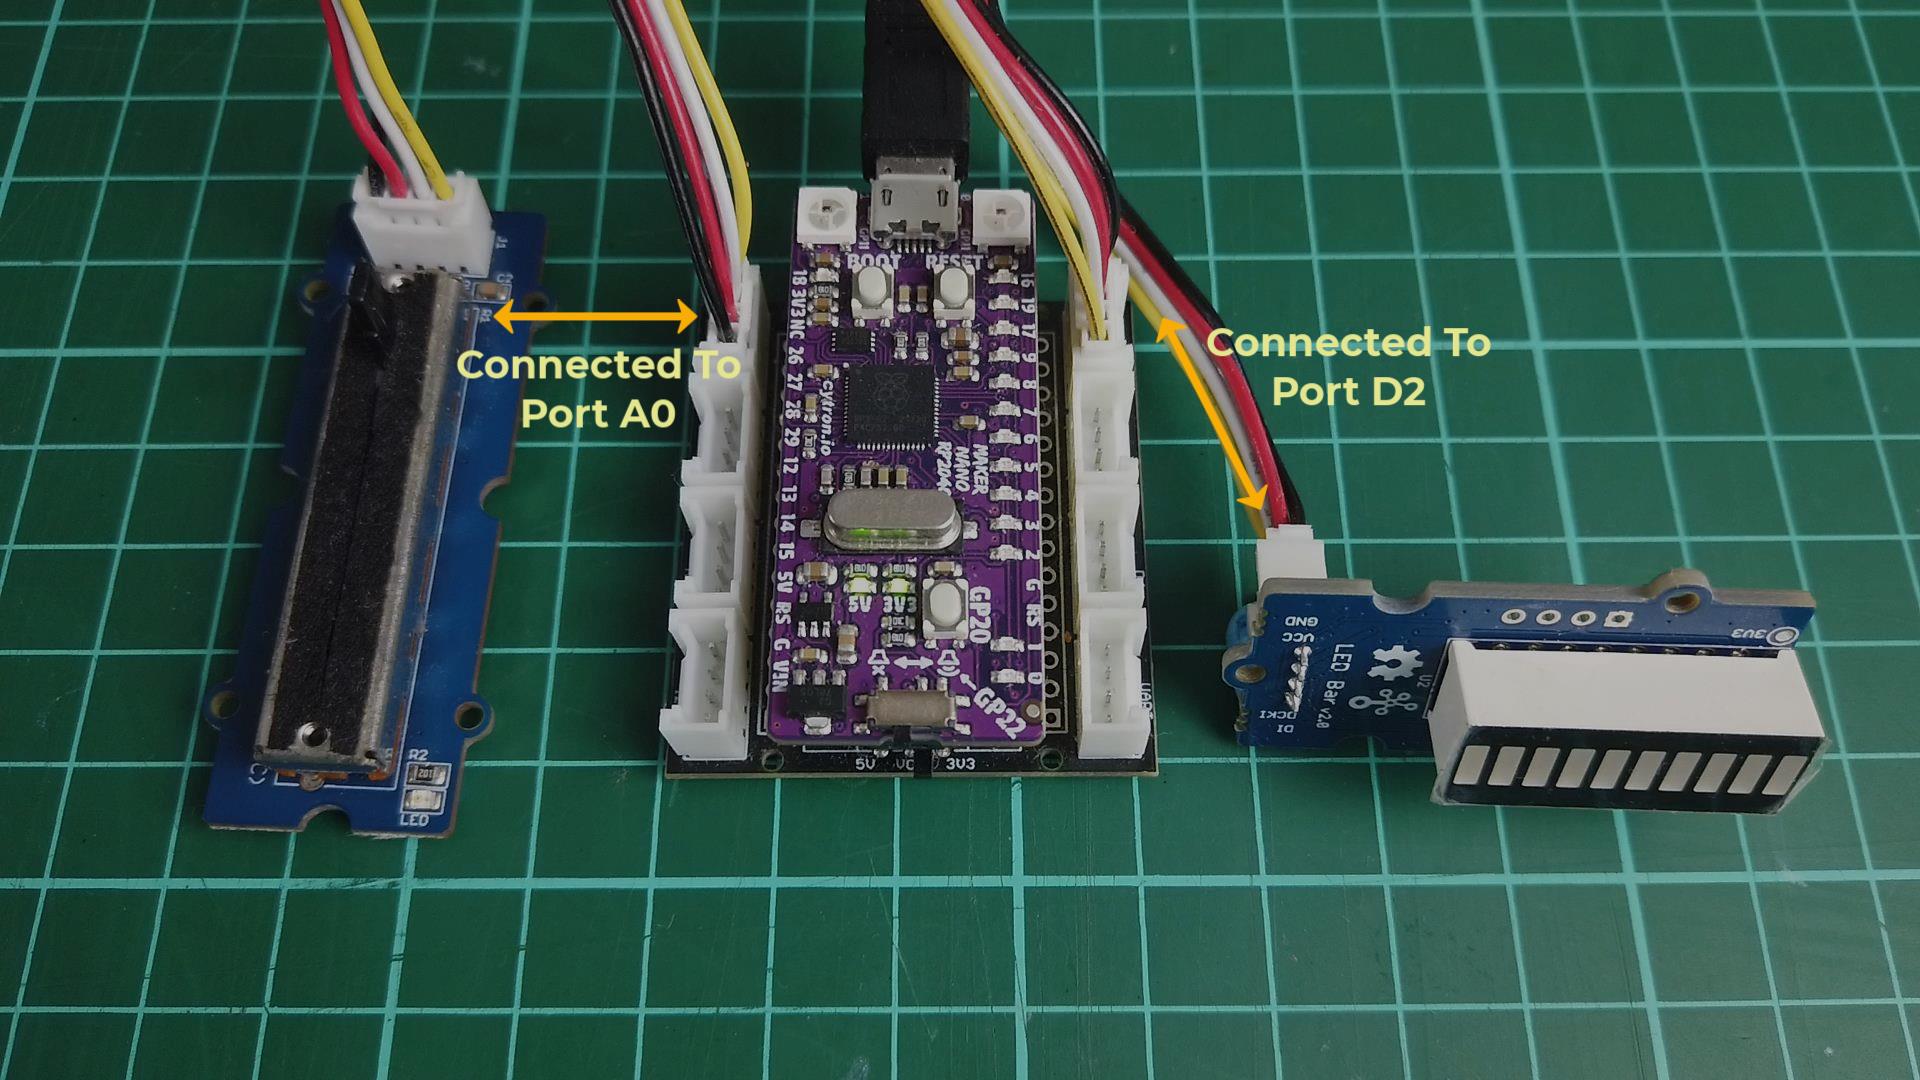
Once the connection are made as per the figure above, we can now start to code.
Code
For the code, first we try to get the serial monitor reading. Next is the complete code.
#include
Grove_LED_Bar bar(3, 2, 0); // Clock pin, Data pin, Orientation
int adcPin = A0; // select the input pin for the potentiometer

int ledPin = A1; // select the pin for the LED

int adcIn = 0;   // variable to store the value coming from the sensor

void setup()

{

    Serial.begin(9600); // init serial to 9600b/s

    pinMode(ledPin, OUTPUT); // set ledPin to OUTPUT

    Serial.println("Sliding Potentiometer Test Code!!");

}

void loop()

{

    // read the value from the sensor:

    adcIn = analogRead(adcPin)/100;

    if(adcIn >= 500) digitalWrite(ledPin,HIGH);  // if adc in > 500, led light

    else digitalWrite(ledPin, LOW);

    Serial.println(adcIn);

    bar.setLevel(adcIn);

    delay(100);

}
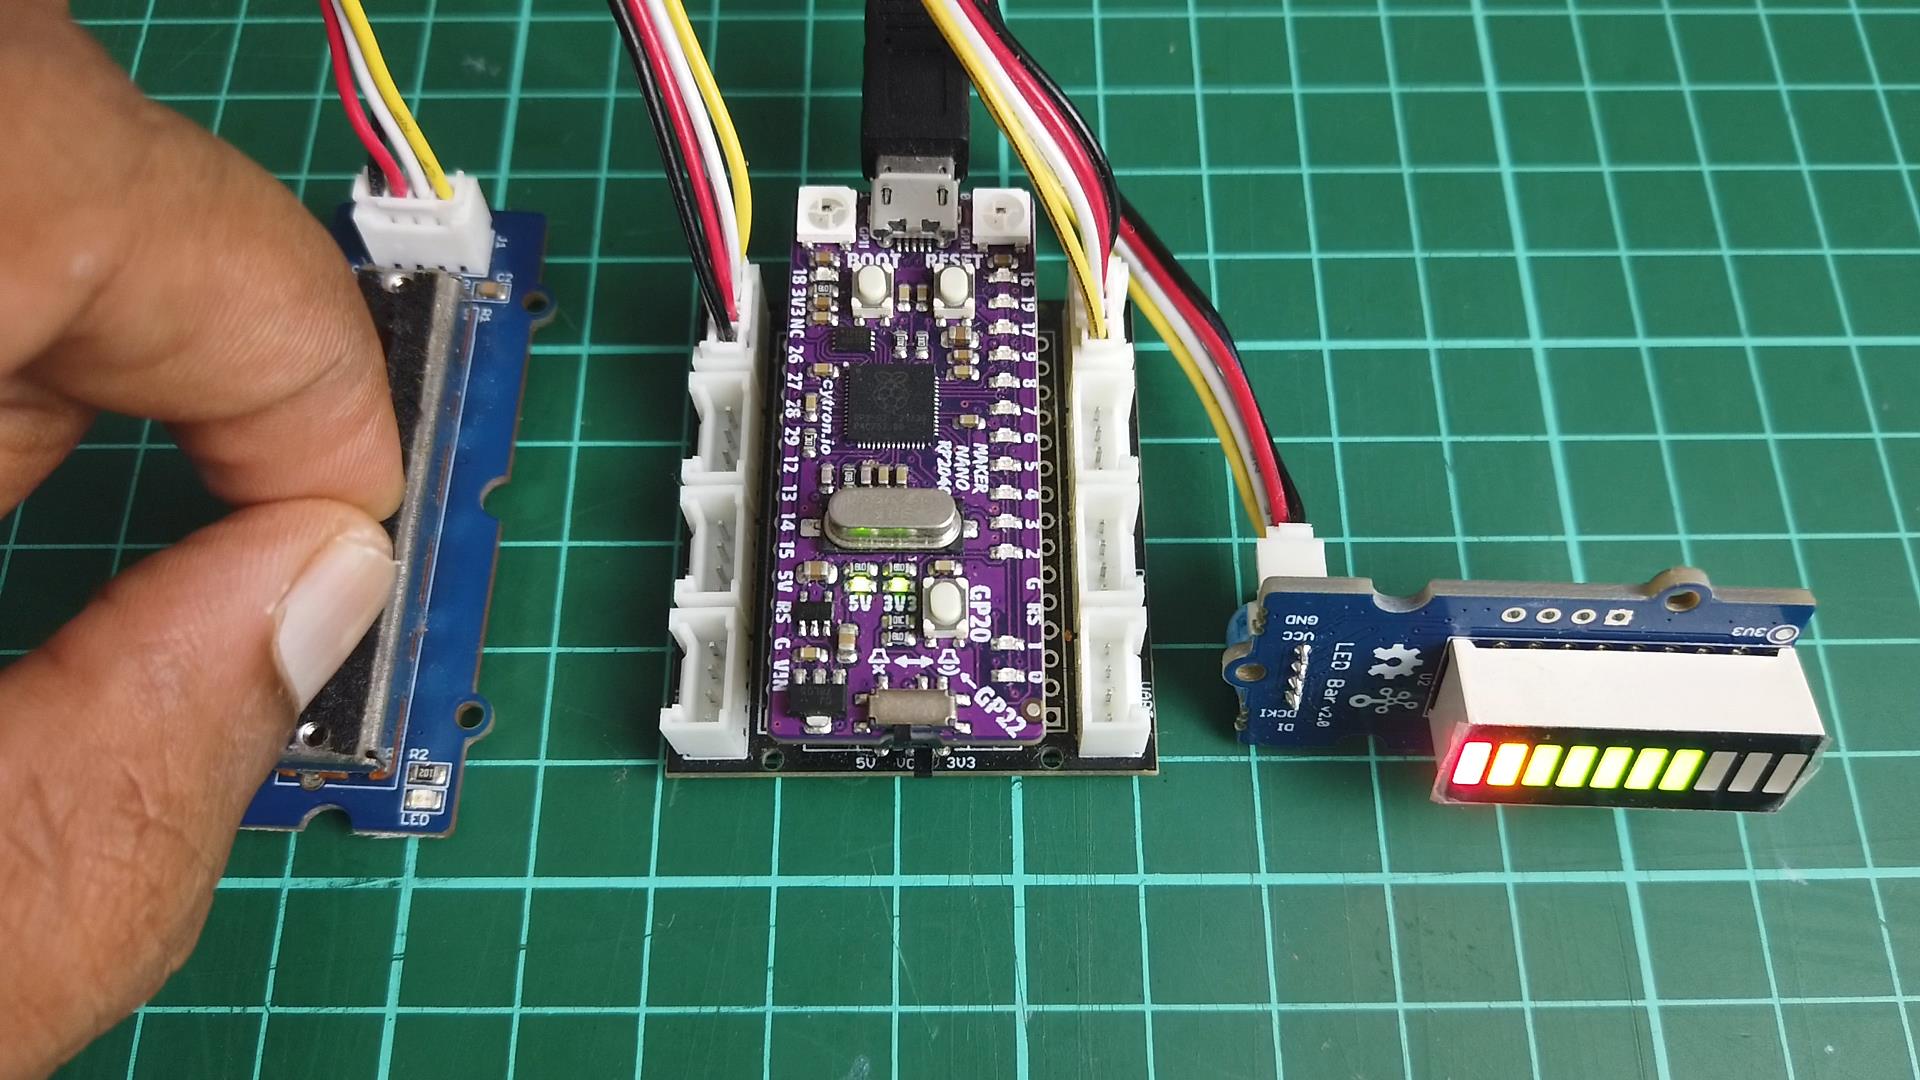
Outcome
This is the final output
Thank You
Thanks for reading this tutorial. If you have any technical inquiries, please post at Cytron Technical Forum.
"Please be reminded, this tutorial is prepared for you to try and learn.
You are encouraged to improve the code for a better application."